- Reverse Engineering Career Paths for Targeted Role Emulation
- Update: Day 0 - Kicking Off the Career Path Homelab Sprint!
- Update: Day 1 - We Have Orchestration (and Remote Access!)
- Update: Day 2 - Forging the Digital Memory: Ceph Storage
- Update: Day 3 - Deploying the ‘Why’: The Immich Gauntlet
- Update: Day 4 - Success! Pixels Find Their New Home
Reverse Engineering Career Paths for Targeted Role Emulation
December 22, 2025
In today’s dynamic job market, simply applying for positions isn’t always enough to land your dream role. Often, there’s a specific trajectory, a set of skills, and a sequence of experiences that successful individuals in those roles have accumulated. My new project is all about dissecting these successful paths – essentially, reverse engineering career trajectories – to create a targeted, actionable roadmap for myself.
What is “Targeted Role Emulation”?
It’s more than just copying a resume. Targeted role emulation involves:
- Identifying Target Roles: Pinpointing specific roles and companies that align with my long-term aspirations.
- Profiling Exemplars: Finding individuals who currently excel in those target roles or have successfully transitioned into them.
- Deconstructing Their Journey: Analyzing their LinkedIn profiles, professional histories, educational backgrounds, certifications, and even their public contributions (e.g., blog posts, open-source projects).
- Extracting Key Milestones: What were their foundational roles? What pivotal projects did they undertake? What skills did they acquire at each stage?
- Mapping Gaps: Comparing their journey to my current profile to identify skill gaps, experience deficits, and strategic moves I need to make.
- Developing an Actionable Roadmap: Translating these insights into a personalized, step-by-step plan for skill acquisition, project development, networking, and targeted applications.
Why This Project Now?
My recent experiences highlighted the gap between my current formal experience and the requirements of my aspirational roles. Rather than seeing this as a disadvantage, I view it as an opportunity for structured growth. This project aims to demystify the “how to get there” question and provide a data-driven approach to career development.
Initial Steps
My first steps will involve:
- Tool Identification: Exploring platforms and tools for data collection (e.g., LinkedIn’s public API, web scraping techniques – ethically and within terms of service, of course!).
- Data Structuring: Defining a clear schema for capturing career data points (e.g., Role, Company, Duration, Key Responsibilities/Achievements, Technologies Used, Certifications).
- Initial Candidate Selection: Identifying a diverse set of individuals whose career paths represent successful navigation to my target roles.
They say career growth is a marathon, but I’m treating it like a sprint. By reverse-engineering the career of an industry-leading IT Manager, I’m using Targeted Role Emulation to master a decade’s worth of skills in seven days. From Ansible automation to Kubernetes clusters, I’ll be sharing the methodology and the ‘war stories’ from my homelab as I engineer my way into my next role. I’m not just building a lab; I’m building a case for why I’m the right fit for the future of IT Operations.”
Update: Day 0 - Kicking Off the Career Path Homelab Sprint!
December 22, 2025
Welcome back to the homelab chronicles! This marks “Day 0” of an ambitious sprint to not just understand, but actively emulate the technical journey required for my target roles.
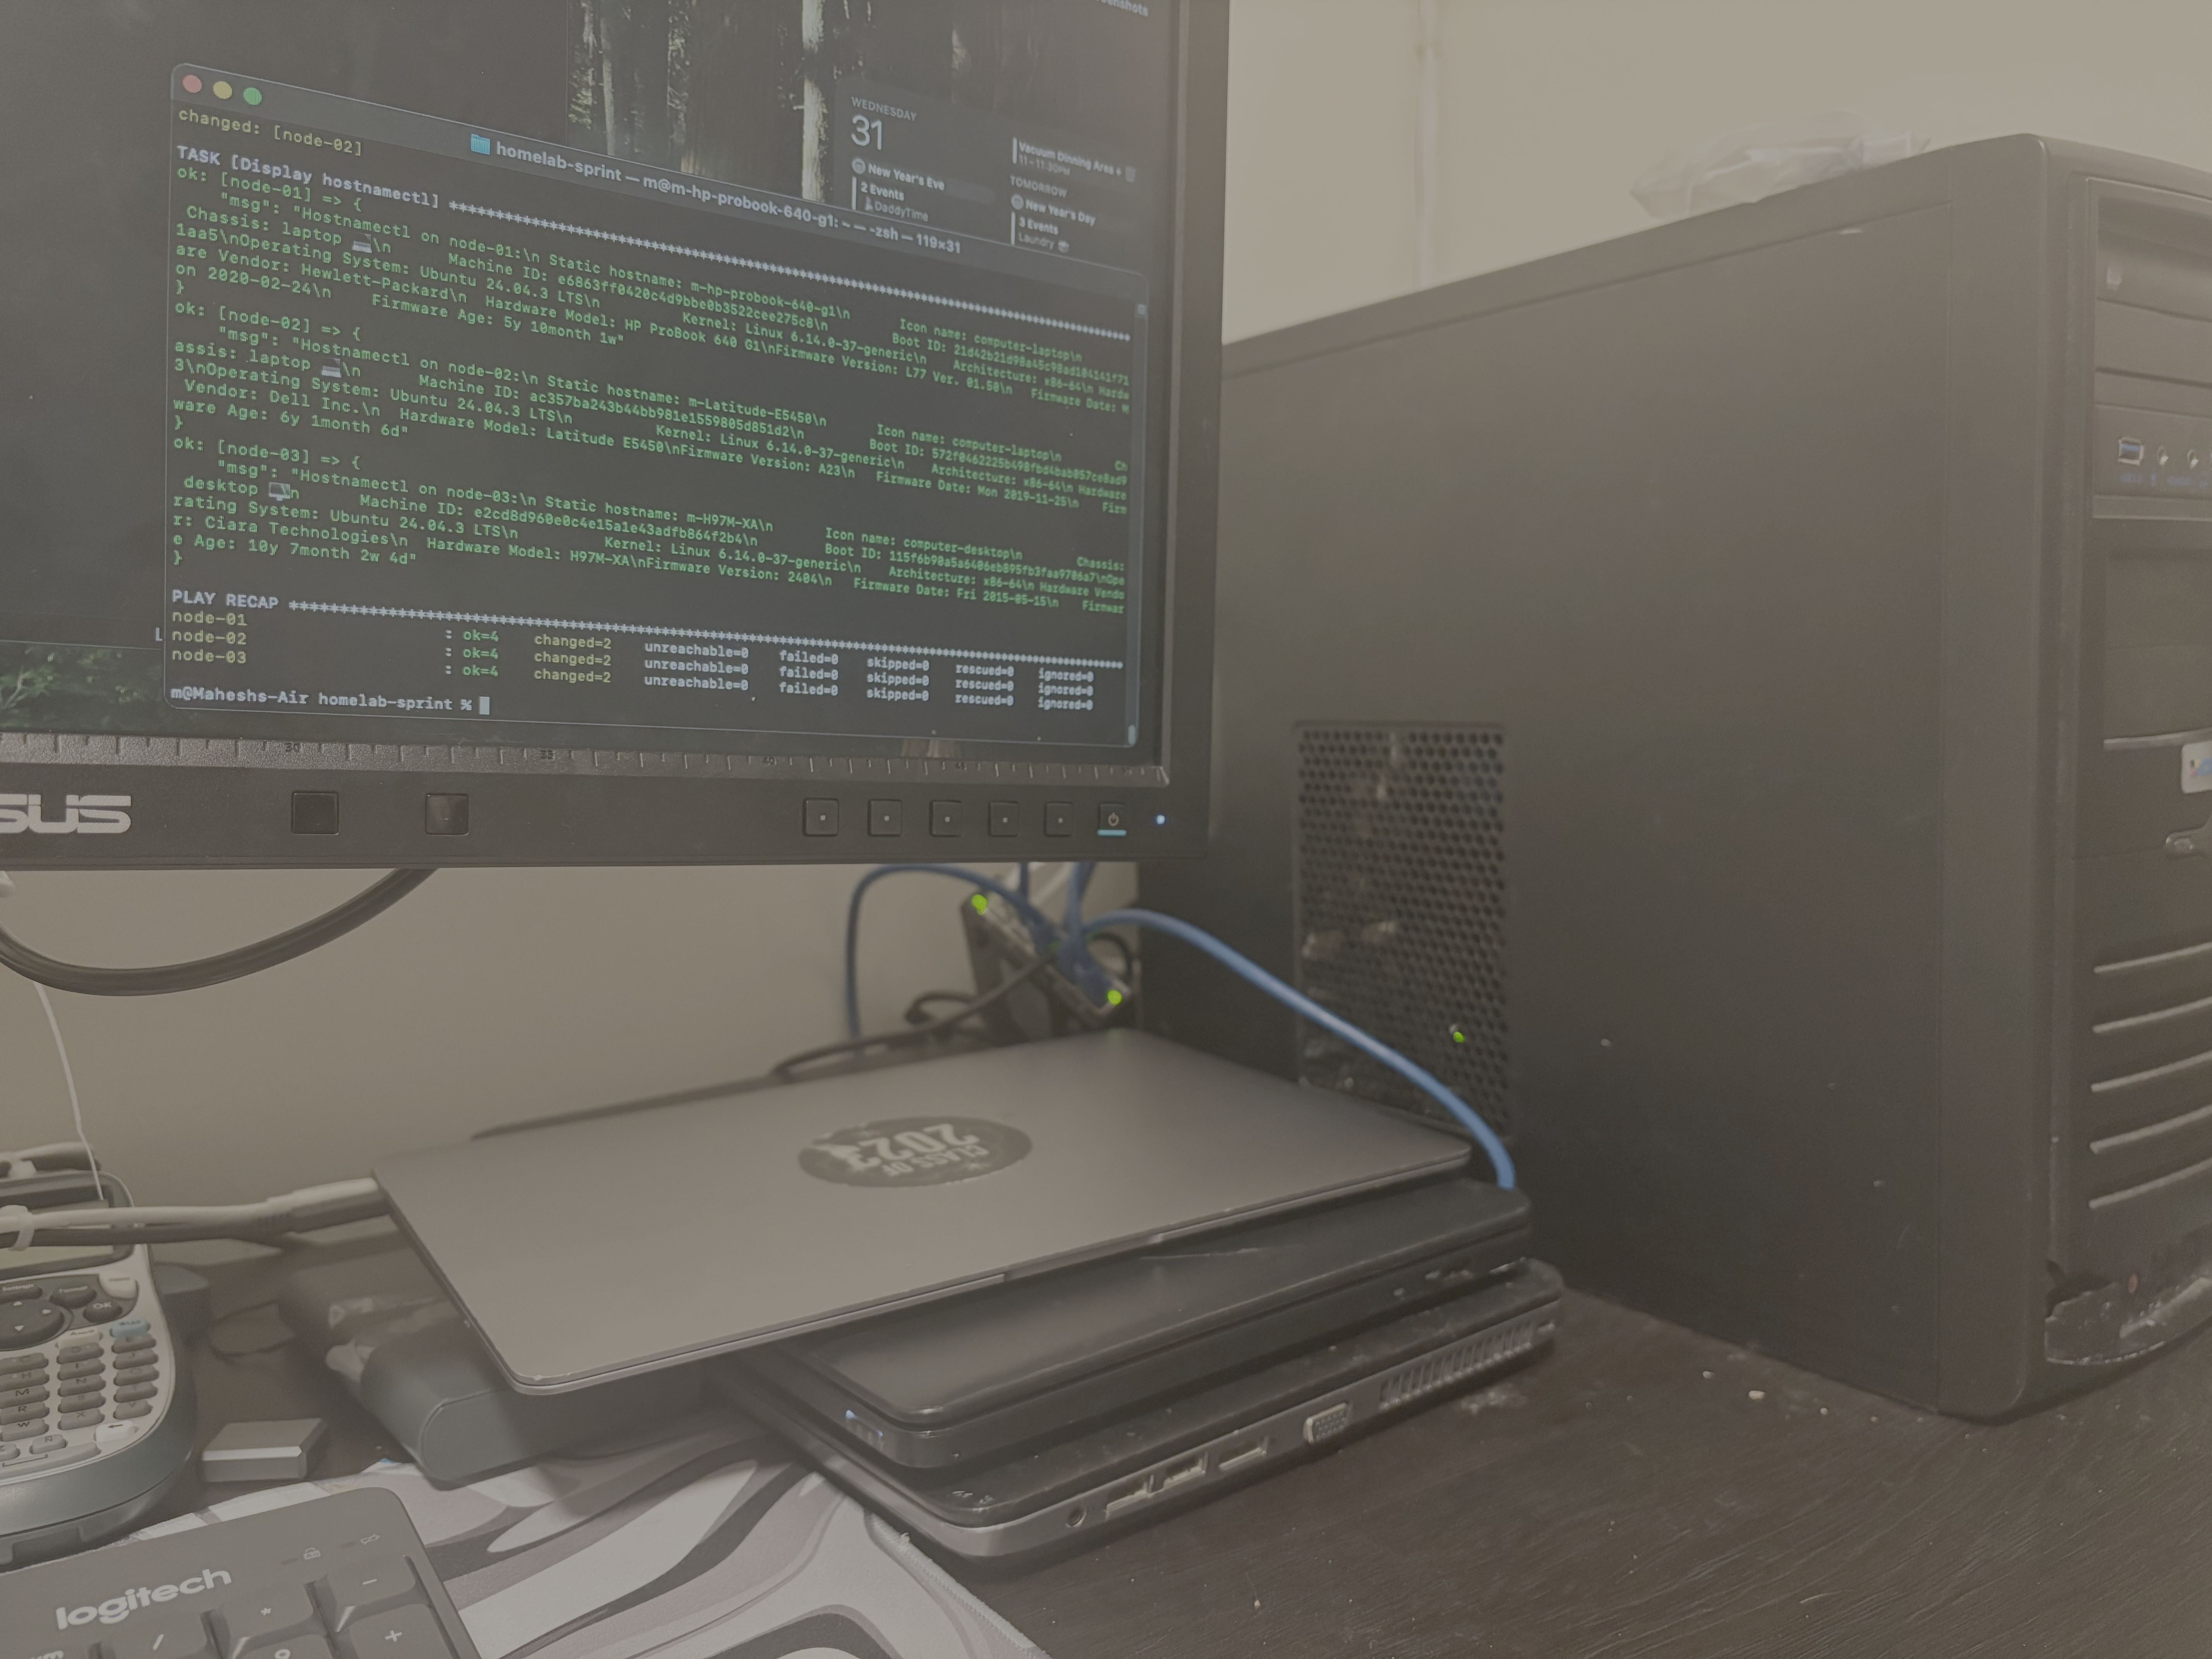
My goal was clear: establish a multi-node Linux cluster with an automation-first mindset. After manually installing Ubuntu on my collection of consumer hardware, I immediately turned to Ansible. I wrote a foundational playbook to configure all nodes, ensuring they were ready for cluster duty. This included crucial tweaks to /etc/systemd/logind.conf to prevent the laptop nodes from sleeping when the lid is closed—a small but vital step in turning laptops into reliable servers. After overcoming initial hardware and UEFI bootloader issues, the three nodes were online, reachable via SSH, and consistently configured via code. The foundation was laid.
Update: Day 1 - We Have Orchestration (and Remote Access!)
December 24, 2025
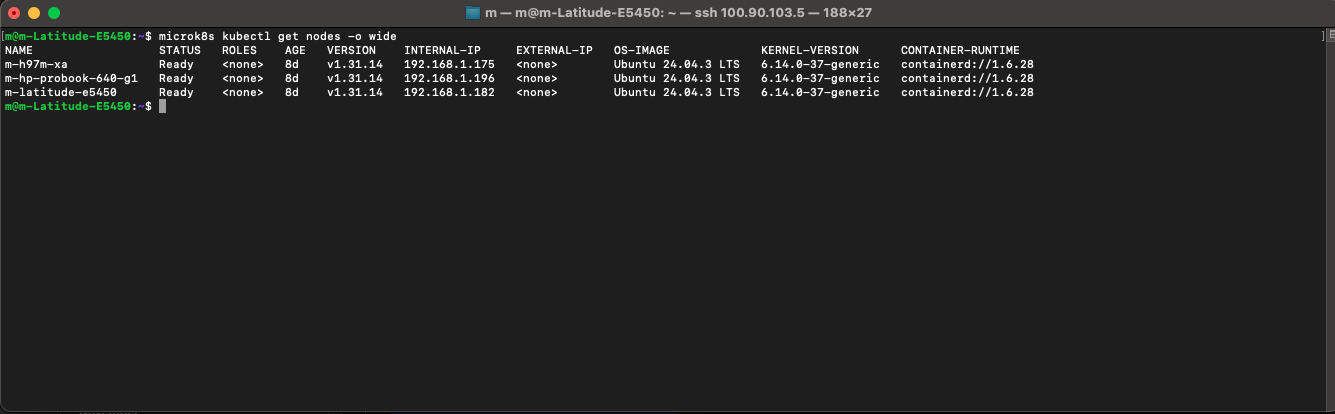
With the baseline configuration handled by Ansible, it was time to install the “brain” of the operation: Kubernetes. I used my existing Ansible playbook to deploy MicroK8s, a lightweight K8s distribution, to all three nodes simultaneously. Within an hour, I had a functioning, multi-node Kubernetes cluster ready to orchestrate containers.
I treated my homelab like a production data center by solving the two biggest hurdles: Access and Availability. First, I set all three devices as Master nodes. Why three? Because of Quorum—the mathematical ‘majority vote’ that prevents a ‘split-brain’ disaster if one node goes offline. Next, I added Tailscale. If Kubernetes is the secure internal hallway of my house, Tailscale is the fortified front gate. By installing it on one node, I created a bridge to the entire cluster, allowing me to manage my ‘private internet’ and SSH into my hardware from anywhere in the world. Tailscale was a quick last-minute add-on
Update: Day 2 - Forging the Digital Memory: Ceph Storage
December 26, 2025
A cluster without resilient, distributed storage is just a toy. Day 2 was dedicated to building the homelab’s long-term memory using Ceph. This was by far the most daunting step.
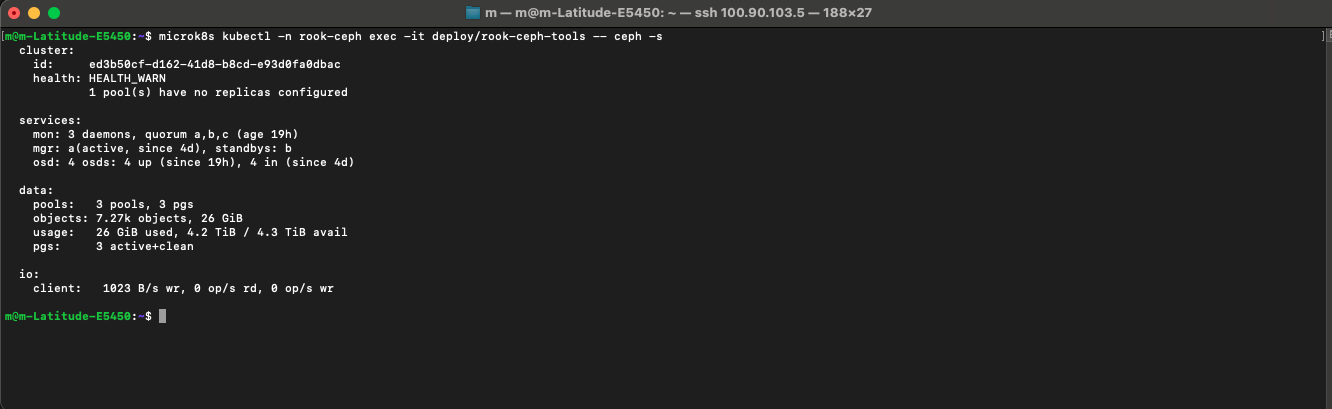
I leveraged the unallocated disk space I had intentionally left on each node during the initial Ubuntu install. Using MicroK8s’s Ceph addon as a starting point, I began the process of creating a cluster-wide storage pool. The initial attempt failed. The Ceph OSDs (Object Storage Daemons) on one of the nodes refused to initialize, leaving the cluster in a HEALTH_WARN state.
After hours of digging through logs (journalctl) and Ceph status commands (ceph -s), I traced the issue to a misconfiguration in the Ceph Crush Map, which tells Ceph how to distribute data across the nodes. After correcting the configuration and re-initializing the OSDs, the cluster finally achieved the coveted HEALTH_OK status. The homelab now has a resilient, self-healing storage layer, ready to provide persistent volumes to applications.
Update: Day 3 - Deploying the ‘Why’: The Immich Gauntlet
December 28, 2025
With the infrastructure in place, it was time to deploy the entire reason for this project: Immich, a self-hosted photo and video backup solution. This meant wrestling with the complexities of Kubernetes deployments.
I spent the day adapting Immich’s Docker Compose files into a series of Kubernetes manifests (Deployments, Services, and PersistentVolumeClaims). The goal was to run the entire Immich stack—the server, the machine learning components, the database (Postgres), and the cache (Redis)—as containers on my cluster.
It was a trial by YAML. The application was deployed, but it was broken. Pods were stuck in CrashLoopBackOff, and the logs revealed a cascade of errors: the Immich server couldn’t connect to the database. The PersistentVolumeClaims were created, but weren’t successfully bound to my Ceph storage pool. Day 3 ended with a deployed but non-functional application.

Update: Day 4 - Success! Pixels Find Their New Home
December 29, 2025
Fueled by coffee and determination, I started Day 4 by dissecting the logs from the previous night. The database connection issue turned out to be a simple typo in a Kubernetes Service name. The Kubernetes DNS was trying to resolve postgres-svc when the service was actually named postgres-service.
With that fix applied, the server pod came up cleanly. The final hurdle was the storage. After another hour of debugging, I realized my StorageClass definition was missing a crucial annotation needed to communicate with the Ceph provisioner. I added the annotation, deleted and reapplied the PersistentVolumeClaim, and watched as it instantly bound to the Ceph pool.
Moments later, the Immich UI was accessible. The final test: I uploaded my first batch of photos. Watching the files upload and then verifying on the command line that the data was being written to the distributed Ceph backend was the ultimate validation of the entire project.
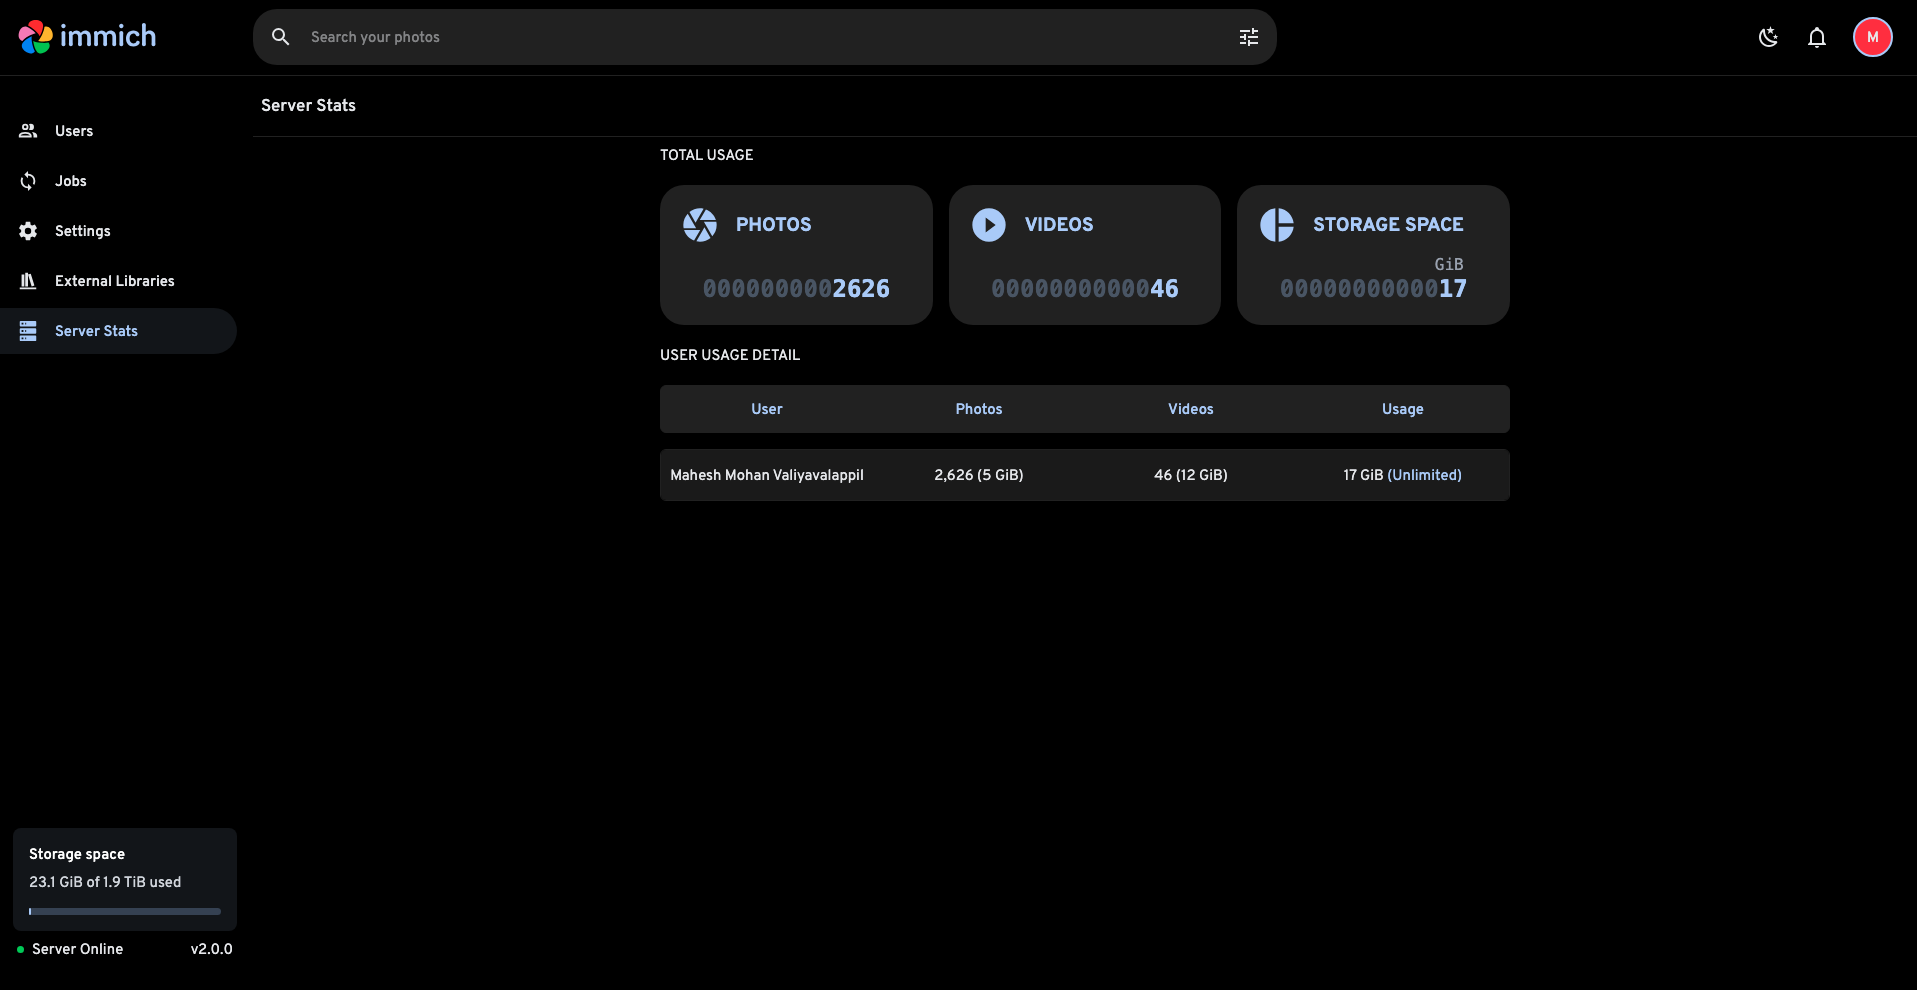
From bare metal to a fully functional, resilient, self-hosted cloud application in five days. The sprint was a success.
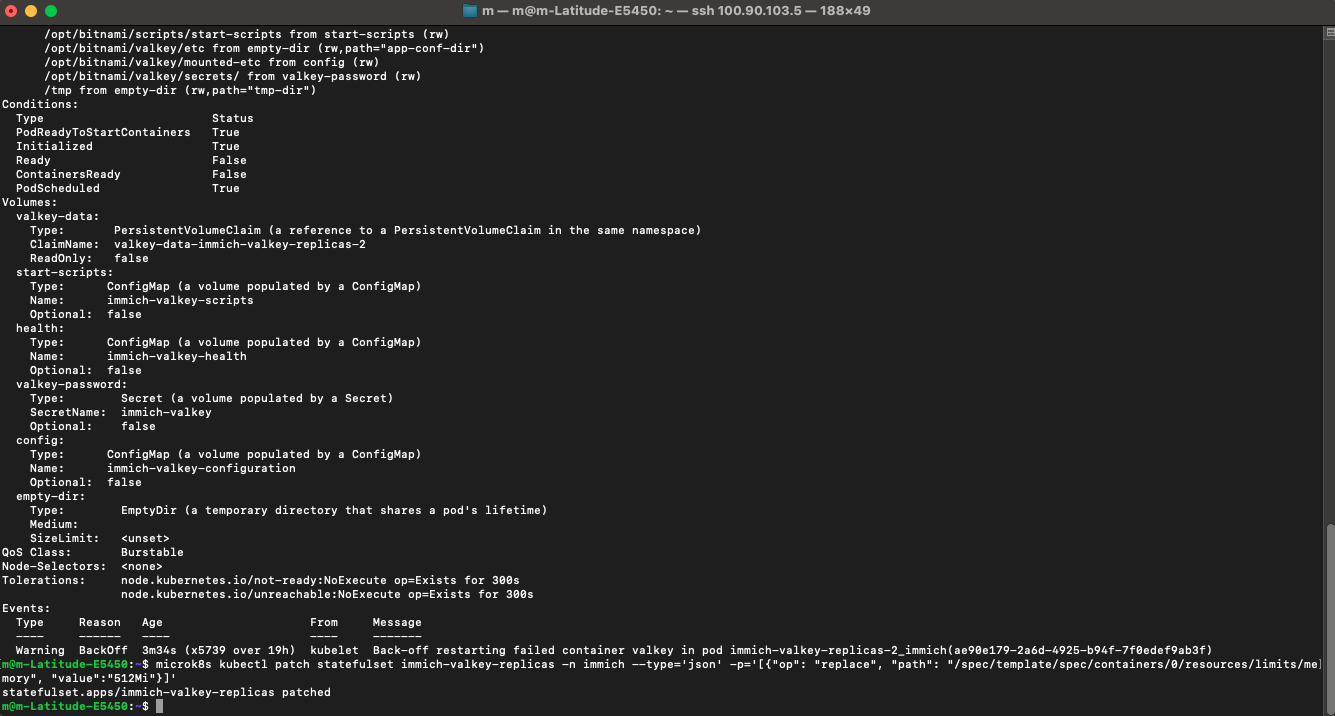
While capturing screenshots for this post, I stumbled upon a classic problem: my Valkey service was stuck in a crash loop. In an Immich cluster, Valkey acts as the system’s high-speed queue; it holds tasks like photo processing and facial recognition in RAM, so the server doesn’t choke when I upload 500 photos at once. It turns out I had set the RAM limits too low for one of my replicas, causing it to ‘starve’ and crash under the load. It was a perfect reminder that even a self-healing cluster needs enough ‘room to breathe’ to do its job.
SO it wasn’t the RAM that was the issue, I found the reason for the 230 restarts: a Corrupted Append Only File (AOF). A sudden power loss had left a ‘broken sentence’ in the database’s logbook. Instead of trying to perform surgery on a broken file, I leaned into the power of a Distributed System.
I tried to delete the corrupted volume, but the terminal just sat there. I had encountered a Kubernetes Finalizer. The cluster was trying to be helpful by protecting a disk that was still attached to a pod. To fix it, I had to perform a ‘force-delete’ on the pod itself, breaking the link and allowing the cluster to finally clear the path for a fresh, clean volume. It’s a reminder that Kubernetes prefers safety over speed.
I wiped the local data of that replica. Like a digital lizard regrowing a tail, the pod started fresh, synced with the Primary master, and turned Green for the first time in two days. This is the beauty of K8s: the system is designed to be ‘disposable’ and ‘rebuildable’.
I successfully pushed 26GB of data into my cluster without a hitch, but the moment I tried to view a single photo from my Mac, everything crumbled. It was a lesson in Asymmetric Performance: uploading is a background task, but viewing is a real-time demand. By giving my services elastic access to my RAM and fixing the underlying storage corruption, I finally turned my ‘storage bin’ into a ‘streaming gallery.’ But a true private cloud shouldn’t rely on a fragile terminal tunnel. My next challenge? Moving past the temporary port-forward and building a permanent gateway using Ingress Controllers and LoadBalancers. Stay tuned for more updates, where I give this cluster a front door that never closes.